


Frequently Asked Questions
-
Q: How often should I clean my hair clippers?
A: Clean your clippers after each use and oil the blades regularly for optimal performance. -
Q: Can I use hair clippers on wet hair?
A: It's best to use clippers on dry hair for more accurate cutting and to prevent damage to the clippers. -
Q: What's the difference between hair clippers and hair trimmers?
A: Hair clippers are designed for cutting larger areas of hair, while trimmers are for detailing and precision work around edges and necklines.
Cutting your own hair or giving a trim to a family member can be a great way to save time and money. However, using hair clippers at home comes with its own set of challenges. Whether you're a beginner or have some experience, it's essential to know the common pitfalls and how to avoid them. In this comprehensive guide, we'll walk you through expert tips and tricks to keep your hair looking sharp and prevent any mishaps. Let's dive into the world of DIY haircuts and learn how to achieve salon-quality results from the comfort of your own home.
1. Choosing the Right Hair Clippers
Before you even begin cutting, it's crucial to select the right tools for the job. Not all hair clippers are created equal, and using the wrong ones can lead to subpar results.
Key factors to consider when selecting hair clippers:
- Motor power and blade quality
- Corded vs. cordless options
- Attachments and guide combs
- Ease of maintenance and cleaning
- Brand reputation and customer reviews
Investing in a high-quality pair of clippers will make your home haircuts much easier and more professional-looking. Look for reputable brands that offer durable products with sharp blades and powerful motors.
Understanding clipper grades
Clipper grades refer to the length of hair left after cutting. They typically range from 0 to 8, with 0 being the shortest (almost bald) and 8 leaving about 1 inch of hair. Understanding these grades is crucial for achieving your desired hair length:
- Grade 0: 1/16 inch (1.5mm)
- Grade 1: 1/8 inch (3mm)
- Grade 2: 1/4 inch (6mm)
- Grade 3: 3/8 inch (10mm)
- Grade 4: 1/2 inch (13mm)
- Grade 5: 5/8 inch (16mm)
- Grade 6: 3/4 inch (19mm)
- Grade 7: 7/8 inch (22mm)
- Grade 8: 1 inch (25mm)
2. Preparing Your Hair and Workspace
One of the biggest mistakes people make is jumping straight into cutting without proper preparation. Taking the time to set up your workspace and prepare your hair can make a significant difference in the final result.
Essential steps for preparation:
- Wash and dry your hair thoroughly
- Detangle hair with a comb or brush
- Set up a well-lit area with a large mirror
- Lay out all necessary tools and hair care products
- Wear a cape or old shirt to catch falling hair
By following these steps, you'll create an ideal environment for a successful haircut and minimize the risk of mistakes due to poor visibility or tangled hair.
Creating the perfect cutting environment
To further enhance your home haircut experience, consider the following tips for creating an optimal cutting environment:
- Use multiple mirrors: Set up a handheld mirror in addition to your wall mirror to easily see the back of your head.
- Ensure proper lighting: Natural light is best, but if that's not possible, use bright, diffused artificial lighting to avoid shadows.
- Choose a comfortable chair: Select a chair that allows you to sit comfortably and maintain good posture throughout the haircut.
- Keep a vacuum or broom nearby: This will make clean-up easier and prevent hair from sticking to your feet or clothes.
- Have a spray bottle ready: Lightly dampening your hair can make it easier to cut and style, especially for certain hair types.
3. Understanding Hair Growth Patterns
One common mistake when using hair clippers is not taking into account the natural growth patterns of your hair. This can result in uneven cuts or patches that are noticeably shorter than the rest.
Tips for working with hair growth patterns:
- Identify the direction of hair growth on different parts of the head
- Always cut against the grain for a closer, more even cut
- Use a comb to lift hair and reveal its natural direction
- Be extra careful around cowlicks and other areas with irregular growth patterns
By understanding and working with your hair's natural growth patterns, you'll achieve a more uniform and professional-looking cut.
Common hair growth patterns
While everyone's hair is unique, there are some common growth patterns to be aware of:
- Crown whorl: Most people have a circular pattern at the crown of their head.
- Nape patterns: Hair at the nape of the neck often grows in various directions.
- Cowlicks: These are areas where hair grows in a different direction from the surrounding hair.
- Temples: Hair often changes direction around the temples.
Take time to study your own hair growth patterns before cutting to ensure the best results.
4. Mastering the Right Technique
Using hair clippers effectively requires more than just running them over your head. Proper technique is crucial for achieving the desired result and avoiding common mistakes.
Key techniques to master:
- Start with a longer guard and gradually go shorter
- Use steady, smooth strokes against the grain
- Overlap each pass slightly to avoid missed spots
- Hold the clippers at a consistent angle
- Use your free hand to guide and tension the hair
Practice these techniques on a small, inconspicuous area before tackling your entire head. This will help you get a feel for the clippers and reduce the risk of major mistakes.
Advanced clipper techniques
Once you've mastered the basics, consider trying these advanced techniques:
- Clipper-over-comb: This technique involves using a comb to lift the hair and then running the clippers over the comb for a more precise cut.
- Point cutting: Use the corner of the clippers to create texture and soften harsh lines.
- Freehand clipper cutting: For experienced users, try cutting without guards for more control and customization.
- Scissor-over-comb: Combine scissors with your clippers for a more refined finish, especially on longer hair.
5. Blending and Fading Techniques
One of the most challenging aspects of using hair clippers at home is achieving a smooth blend between different lengths. Mastering the art of blending and fading can take your home haircuts to the next level.
Tips for seamless blending:
- Use multiple guard sizes to create a gradual transition
- Employ the "rocking" technique to blend between lengths
- Utilize the lever on adjustable clippers for micro-adjustments
- Focus on the transition areas between different lengths
- Use scissors to fine-tune and texturize if necessary
Remember, blending takes practice, so don't get discouraged if your first attempts aren't perfect. With time and experience, you'll develop a better eye for creating smooth transitions.
Types of fades
There are several types of fades you can achieve with practice:
- Low fade: The fade starts just above the ears and neckline
- Mid fade: The fade begins at the temples
- High fade: The fade starts near the top of the sides and back
- Skin fade (bald fade): The hair is tapered down to the skin
- Taper fade: A more gradual fade that leaves more hair on the sides and back
6. Avoiding Common Clipper Mistakes
Even experienced users can fall prey to common mistakes when using hair clippers. Being aware of these pitfalls can help you avoid them and achieve better results.
Common mistakes to watch out for:
- Cutting hair when it's wet or damp
- Using dull or dirty blades
- Applying too much pressure
- Rushing through the haircut
- Neglecting to clean up stray hairs
Take your time, be patient, and pay attention to detail. These simple steps can make a significant difference in the quality of your home haircuts.
Troubleshooting common issues
If you encounter any of these problems, here's how to address them:
- Uneven cutting: Clean the blades and ensure they're properly aligned. If the problem persists, the blades may need sharpening or replacement.
- Pulling or snagging hair: This usually indicates dull blades. Clean and oil the blades, or consider replacing them.
- Clippers getting hot: This is normal during extended use. Take breaks to let the clippers cool down, or use a cooling spray designed for clippers.
- Motor slowing down: If your clippers are cordless, the battery may be low. For corded models, ensure the power cord is securely connected.
7. Maintaining Your Hair Clippers
Proper maintenance of your hair clippers is essential for their longevity and performance. Neglecting this aspect can lead to poor cutting results and potentially damage your hair.
Essential maintenance tips:
- Clean the blades after each use
- Oil the blades regularly
- Align and tighten the blades as needed
- Store clippers in a dry, safe place
- Replace worn-out parts promptly
By taking good care of your clippers, you'll ensure they continue to perform at their best, making your home haircuts easier and more successful.
Deep cleaning your clippers
Periodically, your clippers will benefit from a more thorough cleaning:
- Disassemble the clipper head according to the manufacturer's instructions.
- Use a small brush (often included with the clippers) to remove hair and debris from all parts.
- Wipe down all components with rubbing alcohol to disinfect.
- Once dry, reassemble the clipper head and apply clipper oil to the blades.
- Run the clippers for a few seconds to distribute the oil evenly.
8. Dealing with Different Hair Types
Not all hair is created equal, and different types of hair can present unique challenges when using hair clippers. Understanding how to approach various hair textures and thicknesses is crucial for achieving the best results.
Tips for different hair types:
- Fine hair: Use a lower speed setting and take extra care not to cut too short
- Thick hair: Consider thinning shears to reduce bulk before clipping
- Curly hair: Straighten slightly with a comb while cutting for more even results
- Coarse hair: Use sharp blades and take multiple passes for a clean cut
Experiment with different techniques and hair products to find what works best for your specific hair type.
Specialized techniques for challenging hair types
For particularly challenging hair types, consider these additional techniques:
- Afro-textured hair: Use wider-toothed attachments and cut in multiple directions to account for varying growth patterns.
- Very thick hair: Section the hair and clip away parts you're not currently cutting to maintain control.
- Wavy hair: Cut when dry and in its natural state to avoid unexpected results when the hair settles.
- Thinning hair: Use lighter pressure and opt for longer guard sizes to avoid exposing the scalp.
9. Finishing Touches and Styling
The final steps of your home haircut can make a big difference in the overall look. Paying attention to the details and styling your hair properly can elevate your DIY cut to a professional level.
Steps for the perfect finish:
- Clean up the neckline and around the ears
- Use scissors for any necessary fine-tuning
- Blend any visible lines with thinning shears
- Wash and dry your hair to reveal the final result
- Style with appropriate hair products for your desired look
Take your time with these final steps to ensure your hard work pays off with a polished, professional-looking haircut.
Advanced styling techniques
Once you've mastered the basics, try these advanced styling techniques to take your home haircuts to the next level:
- Texturizing: Use thinning shears or a razor to add texture and movement to your hair, especially effective for thicker hair types.
- Point cutting: Cut into the ends of the hair at an angle to create a softer, more natural-looking finish.
- Layering: Create depth and dimension by cutting different lengths throughout the hair.
- Disconnection: Intentionally create stark contrasts between different sections of hair for a more edgy, modern look.
- Razor cutting: Use a straight razor to create soft, wispy ends and add texture to your style.
Remember to start small with these techniques and gradually build your skills. It's always better to cut less and touch up later than to remove too much hair at once.
10. When to Seek Professional Help
While DIY haircuts can be a great option, it's important to recognize when a task might be beyond your current skill level. There's no shame in seeking professional help for more complex cuts or if you encounter difficulties.
Signs it might be time to visit a professional:
- You're attempting a significant style change
- You've made a mistake that you're unsure how to fix
- You're dealing with very long or extremely thick hair
- You need a precise cut for a special occasion
- You're experiencing hair health issues
Remember, professional stylists have years of training and experience. Sometimes, investing in a professional cut can save you time, stress, and potentially costly mistakes.
Learning from professionals
Even if you prefer cutting your hair at home, there's value in occasionally visiting a professional stylist:
- Observe their techniques and ask questions about their process
- Get advice on the best cut for your face shape and hair type
- Learn about new styling products and tools that could enhance your home haircuts
- Use their cut as a template for maintaining your style at home between salon visits
11. Exploring Different Hairstyles
As you become more confident with your hair clippers, you might want to experiment with different hairstyles. Here are some popular options you can try at home:
- Buzz cut: A simple, all-over short cut
- Crew cut: Short on the sides and back, slightly longer on top
- Fade: Gradual transition from short to longer hair
- Undercut: Short sides and back with longer hair on top
- Textured crop: Short sides with a slightly longer, textured top
Research these styles thoroughly and watch tutorial videos before attempting them. Start with simpler styles and work your way up to more complex cuts as your skills improve.
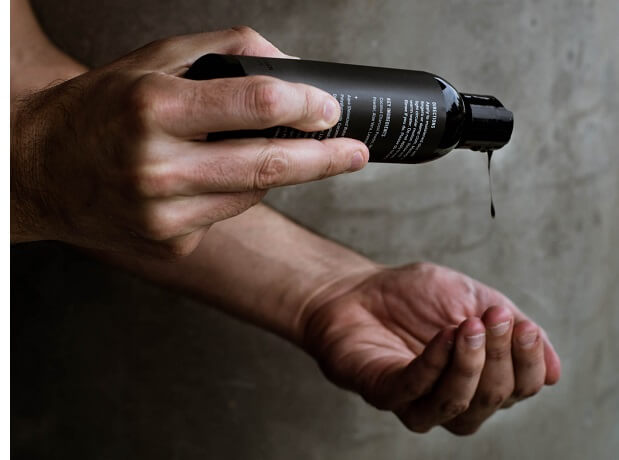
12. Incorporating Hair Care Products
Using the right hair care products can enhance your home haircut and keep your hair looking great between trims. Consider incorporating these products into your routine:
- Pre-styling products: Mousses or creams to add volume and make styling easier
- Styling products: Gels, pomades, or waxes to hold your style in place
- Finishing products: Hairsprays or texturizing sprays for a polished look
- Leave-in conditioners: To keep hair healthy and manageable
- Heat protectants: If you use heated styling tools
Experiment with different products to find what works best for your hair type and desired style.
Conclusion
Mastering the use of hair clippers at home can be a rewarding skill that saves you time and money. By following these expert tips and tricks, you can avoid common mistakes and achieve salon-quality results from the comfort of your own home. Remember to invest in quality tools, prepare properly, understand your hair type, and practice good technique. With patience and practice, you'll be giving great haircuts in no time.
Don't forget to stock up on essential hair care products to maintain your newly cut hair and keep it looking its best between trims. Whether you're a beginner or an experienced home haircutter, there's always room for improvement and new techniques to learn. Happy clipping!
As you continue to develop your home haircutting skills, remember that every head of hair is unique. What works for one person may not work for another, so don't be afraid to adapt these techniques to suit your individual needs. Keep learning, stay patient, and enjoy the satisfaction of mastering this valuable skill. With time, you'll not only save money but also gain the confidence to experiment with different styles and techniques, making your personal grooming routine a fun and creative experience.